Go to your D2L course, then click “Content” from your courses Navigation bar.
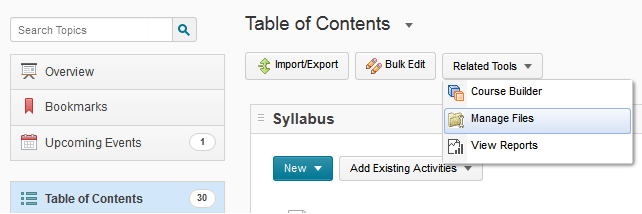
Click on “Table of Contents” from the left-hand menu.
Click on the “Related Tools” button and select “Manage Files.” (NOTE: You can also access “Manage Files” by selecting “Edit Course” from the navigation bar and locating the “Manage Files” link.)
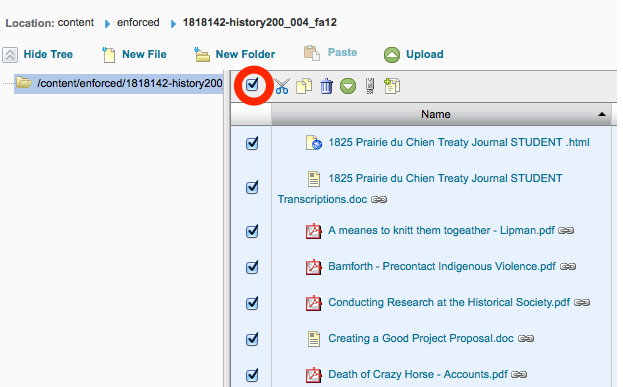
A list of files included in your course will appear. To the left is a list of folders. At the top of the list of files, check the box. This will select all files. Each folder and file will become checked, and their background will become light blue.
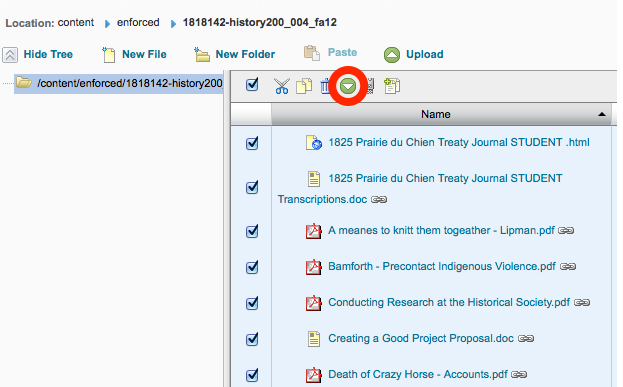
At the top of the page, select the green down-arrow icon, the “Download” icon. All files in the course will be turned into a Zip archive. While D2L is zipping, a window will appear indicating that D2L is working.
When the the files are ready to be downloaded, click the link presented to you. You will be given the option to save the file.